Wednesday, March 14, 2012

Twisty side messy bun


This one was a while ago but it was pretty simple. I started by parting the hair from ear to ear and tied the bottom half of hair out of the way. On the top I parted a third of the hair from the front to the part at her crown and had my daughter hold it out of the way. With the two thirds of hair left I parted in half horizontally and made a pony with the back section. Then I took the front section and just twisted it and combined it with the rest. With the other third of her hair that I parted out of the way I made a twist and brought it across and secured it with the side pony. Then I took all the hair in the pony and made a messy bun and untied the back of the hair and combed it down. This sounds a little complicated but it was really simple and fast. I usually use my flat iron to turn the ends of her hair under just a little for a more finished look...but be careful cause those things are super hot! I added a red daisy from Snapbnadz under the messy bun.

zig zag double frenchies


The zig zag part on this hairdo makes it so fun! I started out with damp hair as usual and used the back of a comb with the pointy end and "drew" a zig zag in the hair. Then I parted from the crown to each ear and added a loose elastic to one side to keep it out of the way. I also tied the hair on the bottom out of the way. On the other side I started doing an inside out french braid. If you know how to french braid it is simple to do the inside out...just add the hair "under" instead of "over." When I got to where my part was at the crown and had no more hair to add I just continued with a 3 strand braid and secured the end. I did the same with the hair on the other side of her head and used an elastic to secure the two braids together in the back. I topped it off white a small hot pink daisy on a clip from Snapbandz.com. When I use a clip this way I put one of the prongs through the elastic so it won't slip. I loved the way this one turned out!

2012 Valentine Hairdo


I know it has been forever since I have blogged. We have moved...AGAIN...and are finally settled in. I will be posting lots to catch up! :) I have seen so many cute heart hairdo's all over the blog world. I think ours turned out so cute! M was excited to wear her hair in hearts for school on Valentines Day. I always like to do M's hair when it is damp...it's way easier to control for me. I started by parting the hair all the way down the middle and securing half so I could work with one side. Then on one side I parted the hair from the crown of her head to her ear and secured the hair with an elastic and fliped the pony so the hair was going up...which is the opposite of how I usually do it. I then combed the bottom section of hair on that side down in a low pony and secured it with an elastic. Then I took the hair that I flipped up on the top and split it into two sections. I made two twists and brought them both down and secured them to the lower ponytail creating the heart shape. You could also easily just do two 3 strand braids and make the heart that way. To do a twist you split the hair in two sections and twist each section the same direction and then twist them together in the opposite direction. I did the same steps on the other side of her head and chose to top this hairdo off with a simple ribbon tied around the pony. I also used a bobby pin on each side of each heart to secure it to her head....these kindergarteners can get kind of rowdy!

Friday, December 3, 2010

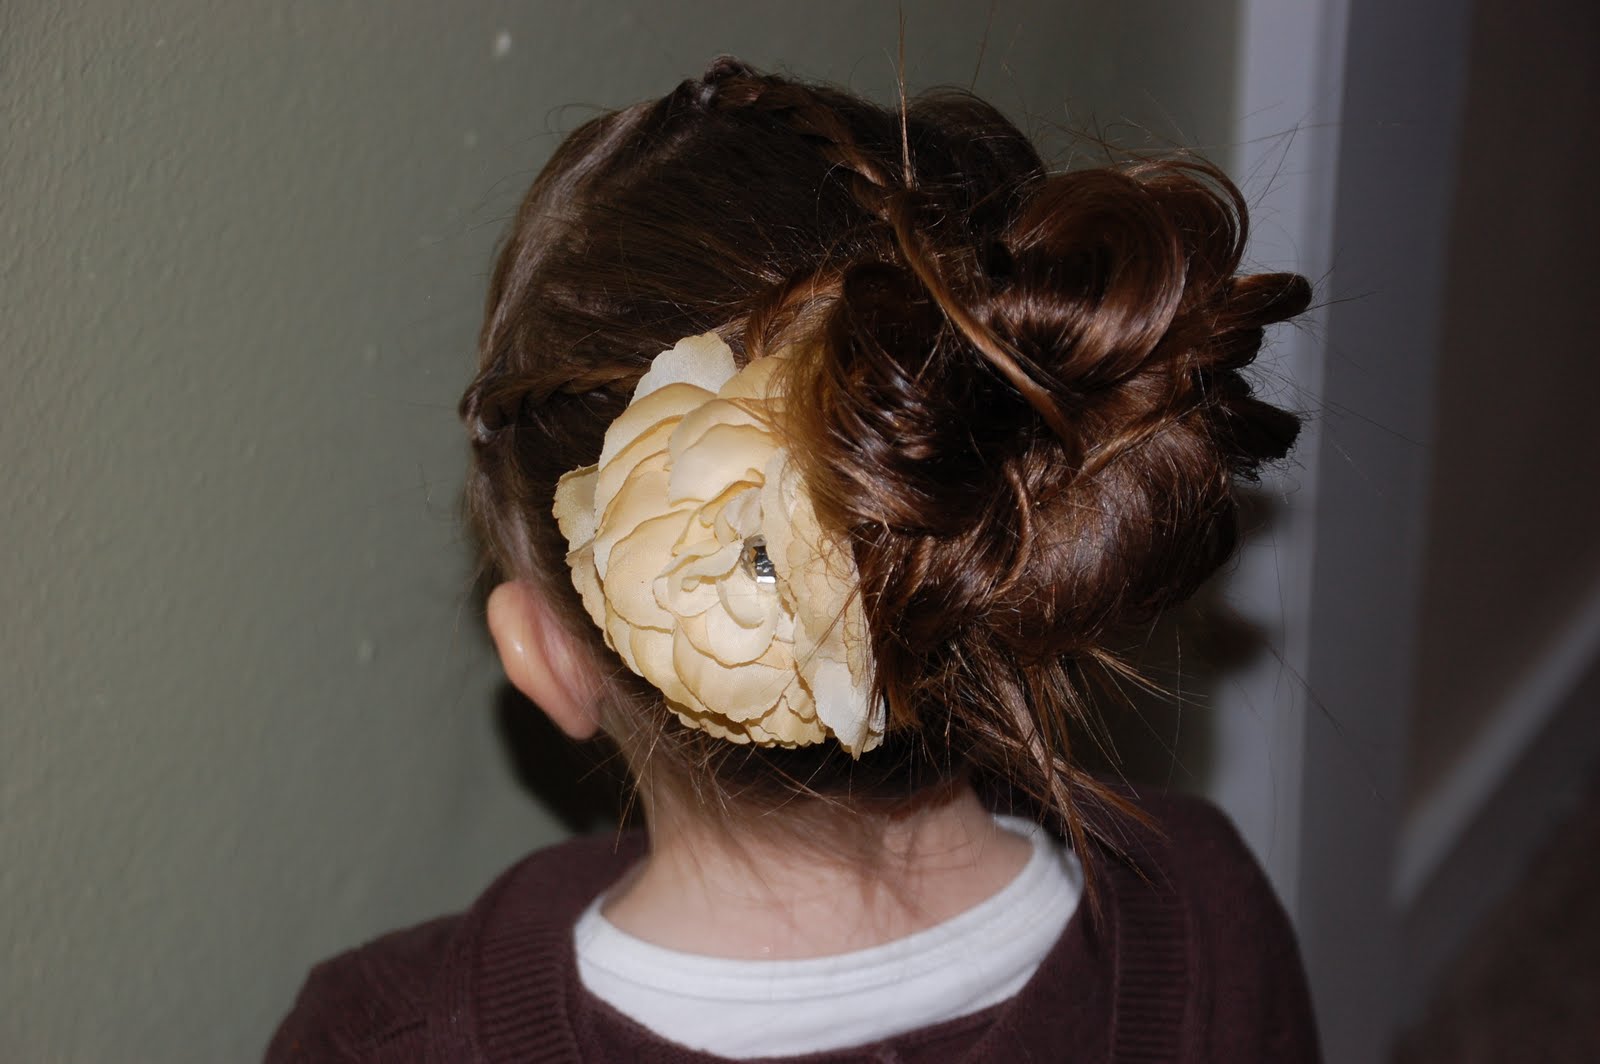
3 twist wormy updo


This one is super simple. I started with 3 flip under knots in the front. I put the rest of the hair up in a pony tail. Then with the hair from the 3 ponies I made 3 ropes and attached them to the big pony. With the hair in the big pony I made a messy bun. The only thing I did different this time I took the hair and split it in half and folded the top half up and the bottom half down and secred it with an elastic. So it looked like a bun with a bunch of hair sticking out around it. Then with the hair sticking out the top I took sections and twisted them, wrapped them down over the bun and secured them with bobby pins. I left most of the hair on the bottom just sticking out. So it looked like a messy wormy bun. I topped it off with a cream ranuncula from Snapbandz. Simple and cute!

Thursday, November 11, 2010

Ropes Braids and Piggy Ropes


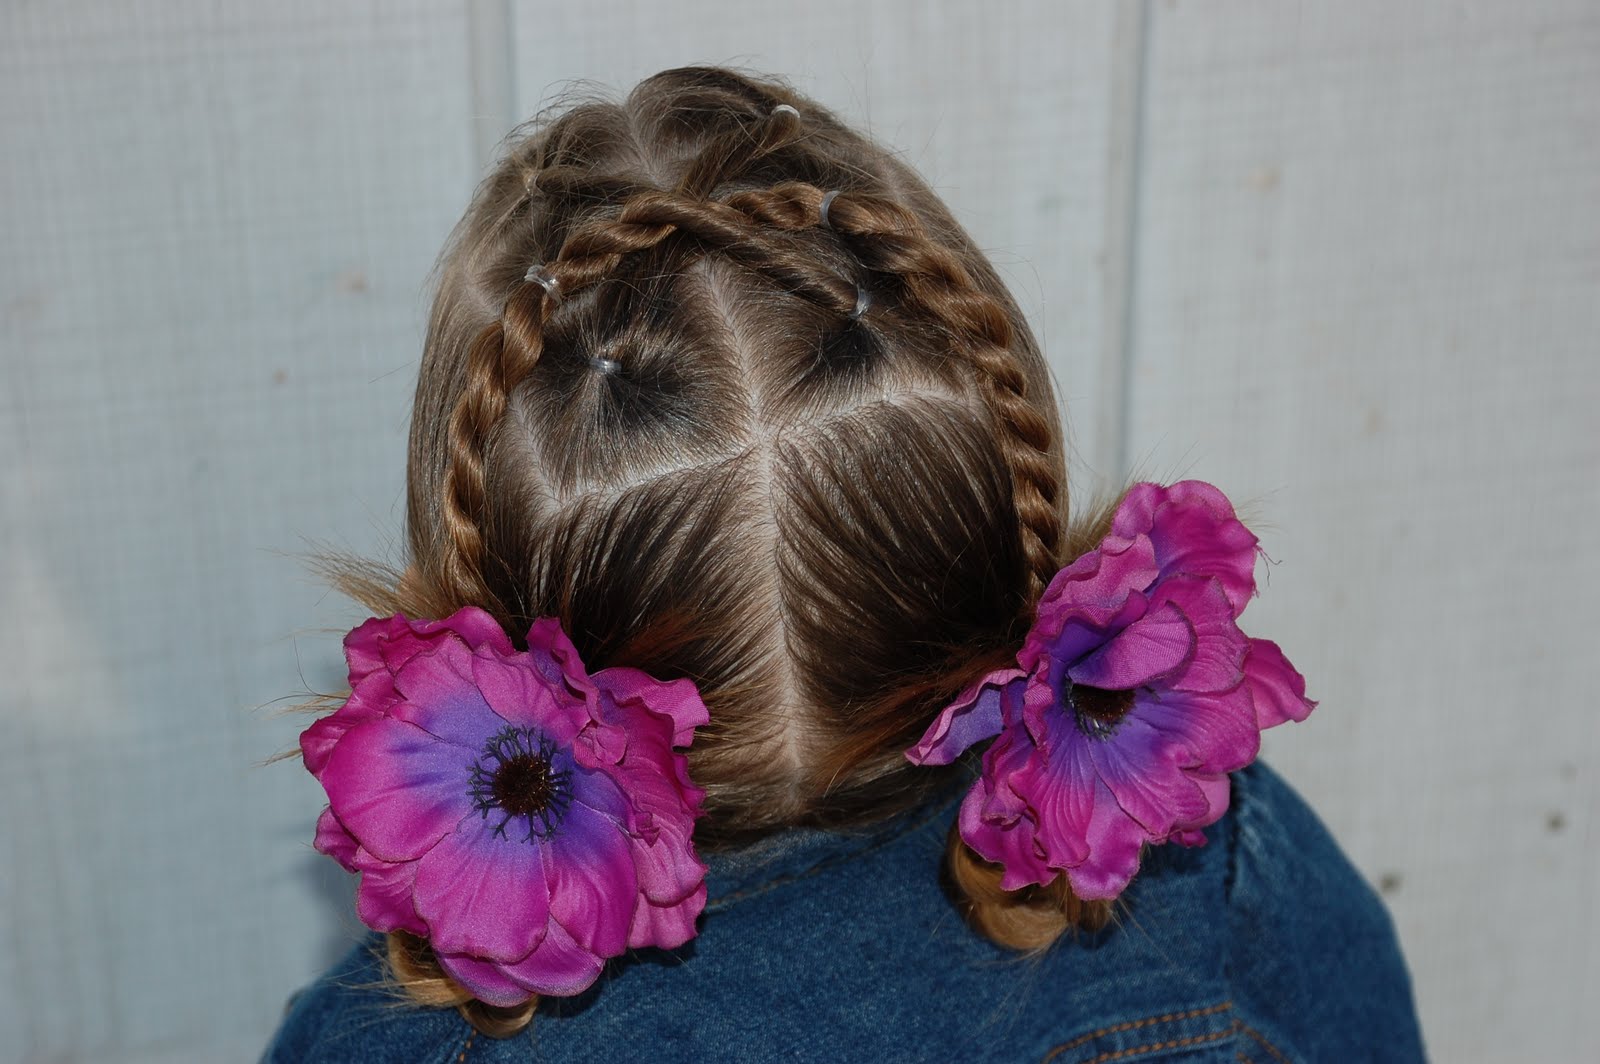
This one started off with six ponies up on top.

I took the hair from the outside 2 ponies one one side and made a rope braid and connected it the the middle pony on the opposite side.

I did the same thing on the other side. The two ropes overlap on top.

Then I parted the remaining hair down the middle and made two pony tails leaving out the hair from the top. With the hair on each side that was left out I made a rope and connected to the ponytail on that same side. Then...with the hair from each of the big ponies I made a rope and folded it up and attached it back at the base leaving the ends sticking out on top. I sprayed them with hairspray to make them more spikey. I added two puple ruffle anemones from snapbandz.com to finish off the look. I used these flowers snapped onto clips. She looked way cute and it stayed in very well!


Tuesday, November 9, 2010

Long time no blog...

I apologize that I have neglected this blog lately. We have been moving...again! Hopefully now we are all settled and I can get to work! I have also been doing a few craft shows. The people in North Dakota are really loving Snapbandz! If you live in the area we will be at the Airport International Inn in Williston this Friday and Saturday the 12th and 13th. The show goes until 8pm on Friday and 5pm on Saturday. Come see us! We will have lots of new Christmas items and will be adding them to our online inventory very soon as well! I also thought I would include a picture of my cute kids from Halloween. We had Little Miss Muffet and her Spider. I love Halloween!

Criss Cross Ropes and Braids


This one was actually prettty simple. I went back about and inch and part the hair ear to ear. I made 3 ropes and 3 braids. I just did every other one a rope or braid. To make a rope braid just part the section in half, twist both sections one way, and them twist them together the opposite way. Make sure to have the braids angle toward the opposite side of the head. I continued the part from the front all the way down making two pony tails. I added the 3 ropes/braids from the right to the left pony tail and secured them with an elastic. With the ropes/braids on the left I crossed them over and under each of the ropes/braids from the left and then secured them to the pony tail on the right. I topped it off with two small white ranunculas from snapbandz.com