Showing posts with label rope braids. Show all posts
Friday, September 13, 2013
3 Twists Side Pony
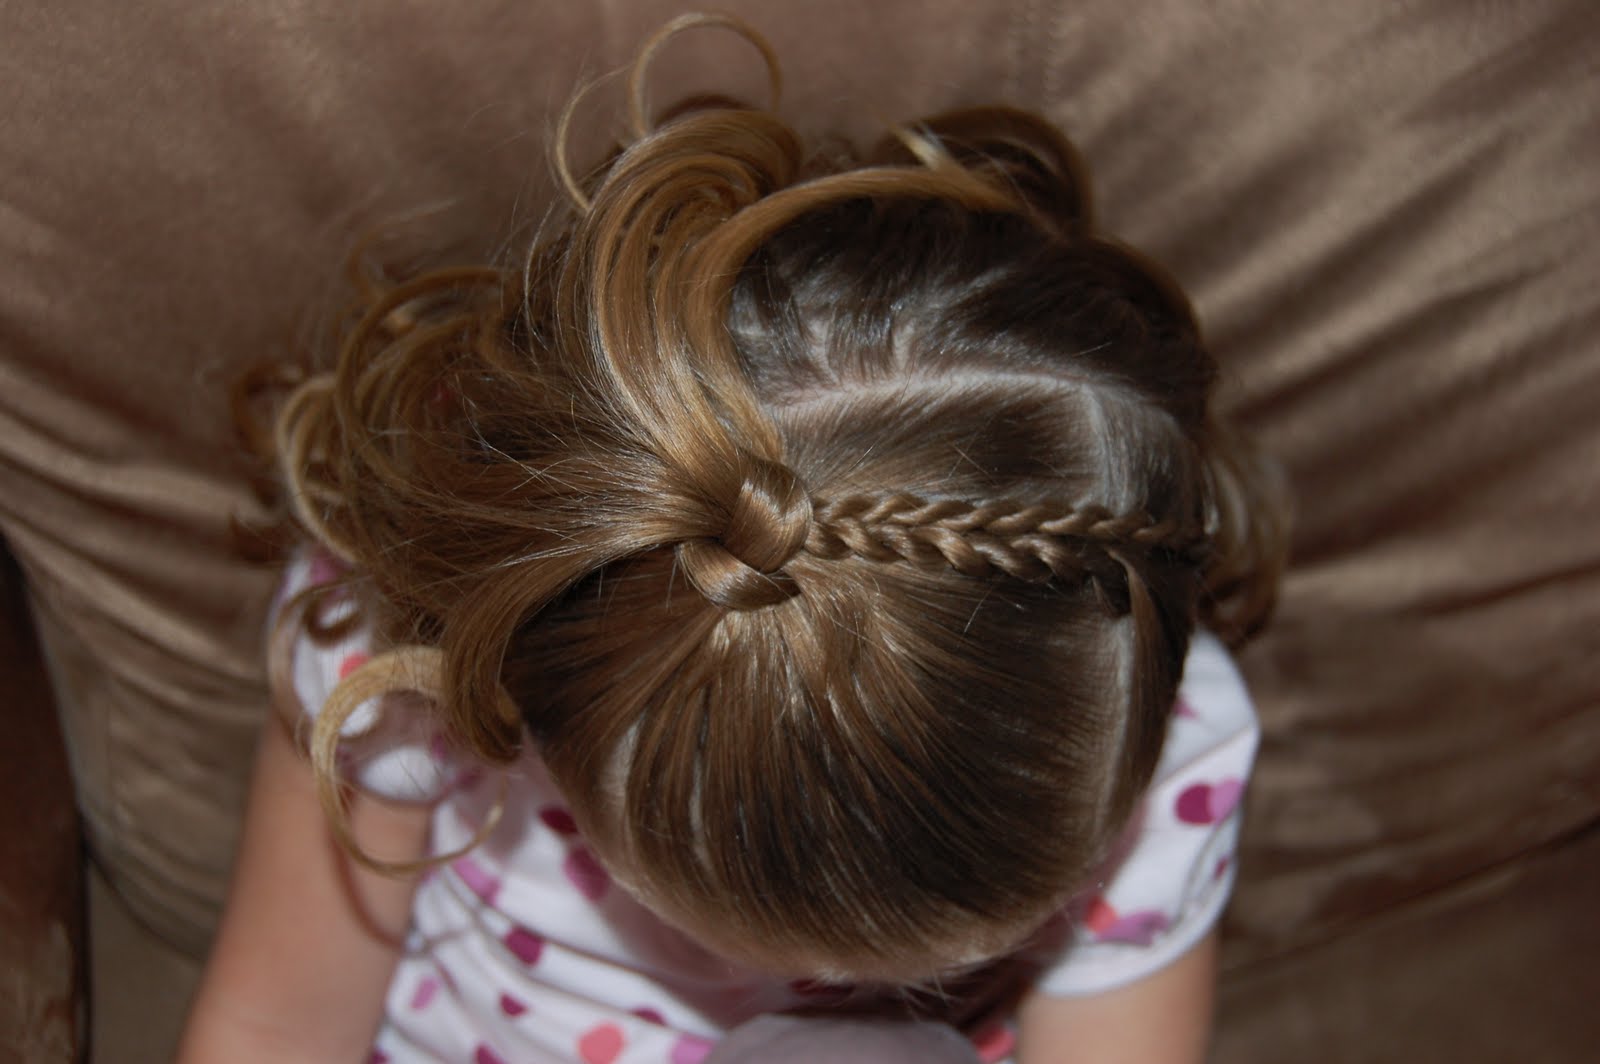
A lot of the time lately we have just been pulling Miss M's hair to the side and flipping it under. We love to add accessories from Snapbandz. This hairdo is a simple variation. Start by parting the hair on the side to the crown. Next make another part about an inch or so parallel to the first. With this section of hair you will make 3 rope braids. To make a rope braid, separate one section of hair into two pieces, twist both pieces the same direction separately and then twist them together the opposite direction. I have my daughter hold each rope as I do the next. Then part the hair from the crown to the ear, comb smooth and add a small elastic. You can do this step before you make the rope braids if it is easier. Add the 3 rope braids to the pony and secure again. I just used my pinky to flip the hair down through the pony. You can use a topsy tail or back of a rattail comb for this as well. I almost always flip Miss M's pony tails...I think it makes it lay nicer and look more polished. We added one of our adorable boutique bows on a skinny band from Snapbandz. If you haven't checked out the new boutique bows yet you really should! They can snap onto any of our headbands or onto one of our clips. www.snapbandz.com We have lots to choose from and are adding more all the time. If you need specific colors send us an email! mandymills@snapbandz.com
Thursday, February 14, 2013
Valentines Hairdo 2013
.jpg)
.jpg)
Here is Miss M's Valentine do for 2013. I started by getting the hair damp and parting it on the side. Then I parted it on the opposite side to make a box on the top of her head. Using the back of my comb I "drew" a heart inside the box created a heart shaped part. Get it? Then I combed it into a ponytail at the bottom of the heart and loosely put in an elastic. To do the heart shape you want to flip the hair up using a topsy tail, rait tail comb or your pinky finger. I had my daughter hold this hair out of the way as I combed the rest of the hair into a side ponytail. Then I sectioned the top pony tail into two pieces. Each side makes a rope. Remember to do the rope just twist both pieces of hair the same direction and together the opposite direction. This definitely works better with damp hair and I use a little bit of hairspray as well. After I did the first rope I had my daughter hold it as I did the second. Then I took both ropes and brought them down to the bottom pony tail and secured with an elastic. I used short bobby pins to pin the ropes down and to create a heart shape. I took a long section of hair from the pony and wrapped it around to cover the elastic and secured with a small clear elastic and pulled tight. The cute little ribbon hearts were so easy to make. They are just glued to a bobby pin! I stuck them in and used a second bobby pin creating an "x" to make sure they held all day. To finish it off I used my straightener and curled the pony tail a bit. I bet she gets lots of compliments at school today! Happy Valentines Day everyone!
Thursday, November 11, 2010
Ropes Braids and Piggy Ropes
This one started off with six ponies up on top.
I took the hair from the outside 2 ponies one one side and made a rope braid and connected it the the middle pony on the opposite side.
I did the same thing on the other side. The two ropes overlap on top.
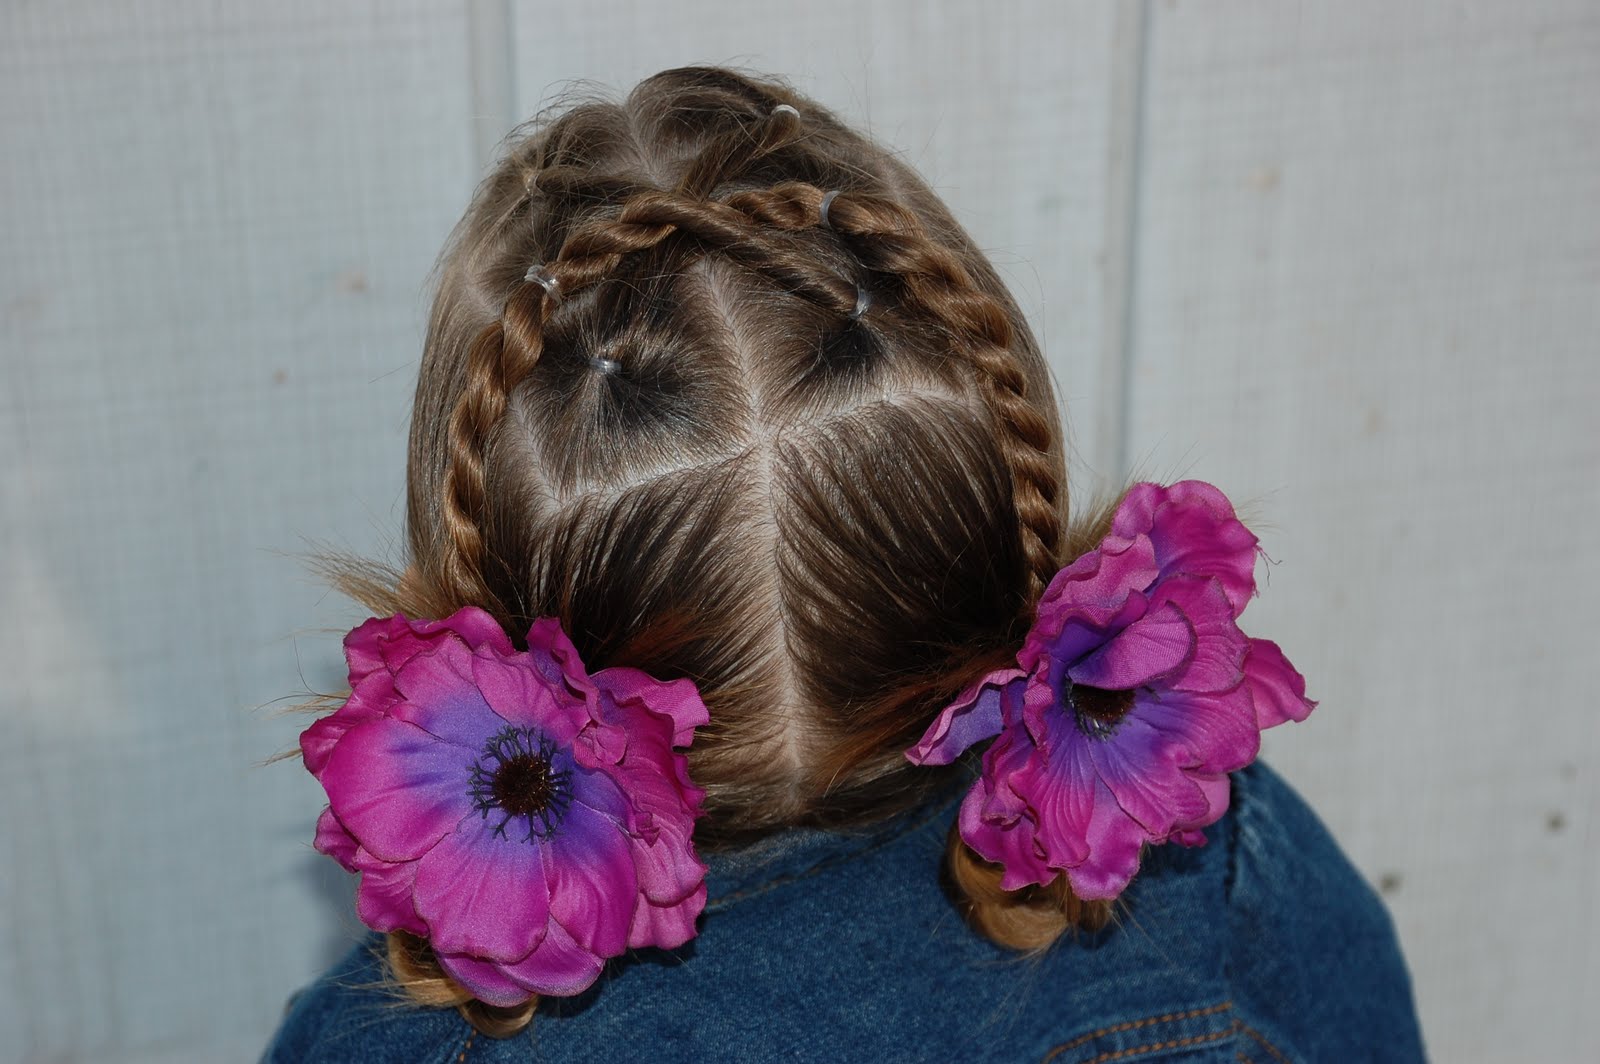
Then I parted the remaining hair down the middle and made two pony tails leaving out the hair from the top. With the hair on each side that was left out I made a rope and connected to the ponytail on that same side. Then...with the hair from each of the big ponies I made a rope and folded it up and attached it back at the base leaving the ends sticking out on top. I sprayed them with hairspray to make them more spikey. I added two puple ruffle anemones from snapbandz.com to finish off the look. I used these flowers snapped onto clips. She looked way cute and it stayed in very well!
Tuesday, November 9, 2010
Criss Cross Ropes and Braids
This one was actually prettty simple. I went back about and inch and part the hair ear to ear. I made 3 ropes and 3 braids. I just did every other one a rope or braid. To make a rope braid just part the section in half, twist both sections one way, and them twist them together the opposite way. Make sure to have the braids angle toward the opposite side of the head. I continued the part from the front all the way down making two pony tails. I added the 3 ropes/braids from the right to the left pony tail and secured them with an elastic. With the ropes/braids on the left I crossed them over and under each of the ropes/braids from the left and then secured them to the pony tail on the right. I topped it off with two small white ranunculas from snapbandz.com
Thursday, September 30, 2010
2 ropes 2 messy buns
I started this by sectioning the front third of her hair from ear to ear. I placed the elastic on the far right.

Then I took the second third of hair and split it in half and made two ponies. Next was the bottom third of hair with the elastic on the far left. You should have four ponies total. I did this with her hair damp and used lots of hairspray!

The I took the hair from the bottom pony and made a rope braid and connected it to the middle right pony and made a messy bun. (Remember for the rope braid just split the hair in half, twist both pieces the same direction and twist them together the opposite way the individual pieces were twisted.)For these messy buns I just wadded up the hair and added a clear elastic to hold it. I pulled a different pieces until it looked the way I wanted. I used a couple elastics on each bun.

To finish it off I added a white daisy from snapbandz.com by the front elastic.This hairdo lasted us two days!


Then I took the second third of hair and split it in half and made two ponies. Next was the bottom third of hair with the elastic on the far left. You should have four ponies total. I did this with her hair damp and used lots of hairspray!

The I took the hair from the bottom pony and made a rope braid and connected it to the middle right pony and made a messy bun. (Remember for the rope braid just split the hair in half, twist both pieces the same direction and twist them together the opposite way the individual pieces were twisted.)For these messy buns I just wadded up the hair and added a clear elastic to hold it. I pulled a different pieces until it looked the way I wanted. I used a couple elastics on each bun.

To finish it off I added a white daisy from snapbandz.com by the front elastic.This hairdo lasted us two days!

Friday, August 20, 2010
Two Twists Headband.
This one was way simple and so cute! Start by parting the hair on either side. Part about two inches back and then to the back of the ear on each side. Take the rest of the hair and pull it back out of the way. Make a second part next to the first to make a box. Take that piece of hair and make a rope braid. Make another part and do it again. Make sure they are start in different spots so they are next to eachother and not over lapping.
I just had my little girl hold the twist while I made the second. Then slick the hair down on both sides and add the twist to the one side. Take the hair from the "headband" and bring it together at the base of her neck and secure with an elastic.
I added a brown dahlia on a clip from snapbandz.com. I LOVED this one. It would be cute to pull the rest of the hair up or curl it or something too, but I loved it just down and long. It was super windy outside and she was in a goofy mood...that explains the pictures! haha
Wednesday, August 18, 2010
Two rope braids+half pony
I started this one by sectioning a square on top of her head and adding an elastic to the back right side. You should have hair still down on the right and left sides of her head.
With the hair on the left side of the pony I split it in half from the front to the back of her head. With the section of hair closest to the pony I made a rope braid and secured it to the pony. I did the same thing with the remaining hair on the left side. Just make sure that the two braids start in different spots so they are next to eachother and not overlapping. (Remember to do the rope braid you just take two pieces of hair, twist them the same direction and then twist the two twists together the opposite way you twisted the twists. haha I promise it's simple.)

With the hair on the right side of the pony I combed it toward the pony and wrapped it around the elastic twice.

I used my topsy tail to take the hair down through itself hiding the elastic. If you don't have a topsy tail I have seen people just use a pipe cleaner and make their own. Very simple...and cheap!

So cute!
It would look good with the hair down and straight but I decided to adds some curls with my good old curling iron. Love it!

With the hair on the left side of the pony I split it in half from the front to the back of her head. With the section of hair closest to the pony I made a rope braid and secured it to the pony. I did the same thing with the remaining hair on the left side. Just make sure that the two braids start in different spots so they are next to eachother and not overlapping. (Remember to do the rope braid you just take two pieces of hair, twist them the same direction and then twist the two twists together the opposite way you twisted the twists. haha I promise it's simple.)
With the hair on the right side of the pony I combed it toward the pony and wrapped it around the elastic twice.
I used my topsy tail to take the hair down through itself hiding the elastic. If you don't have a topsy tail I have seen people just use a pipe cleaner and make their own. Very simple...and cheap!
So cute!
It would look good with the hair down and straight but I decided to adds some curls with my good old curling iron. Love it!
Friday, May 28, 2010
Zig Zag Rope Braid Updo
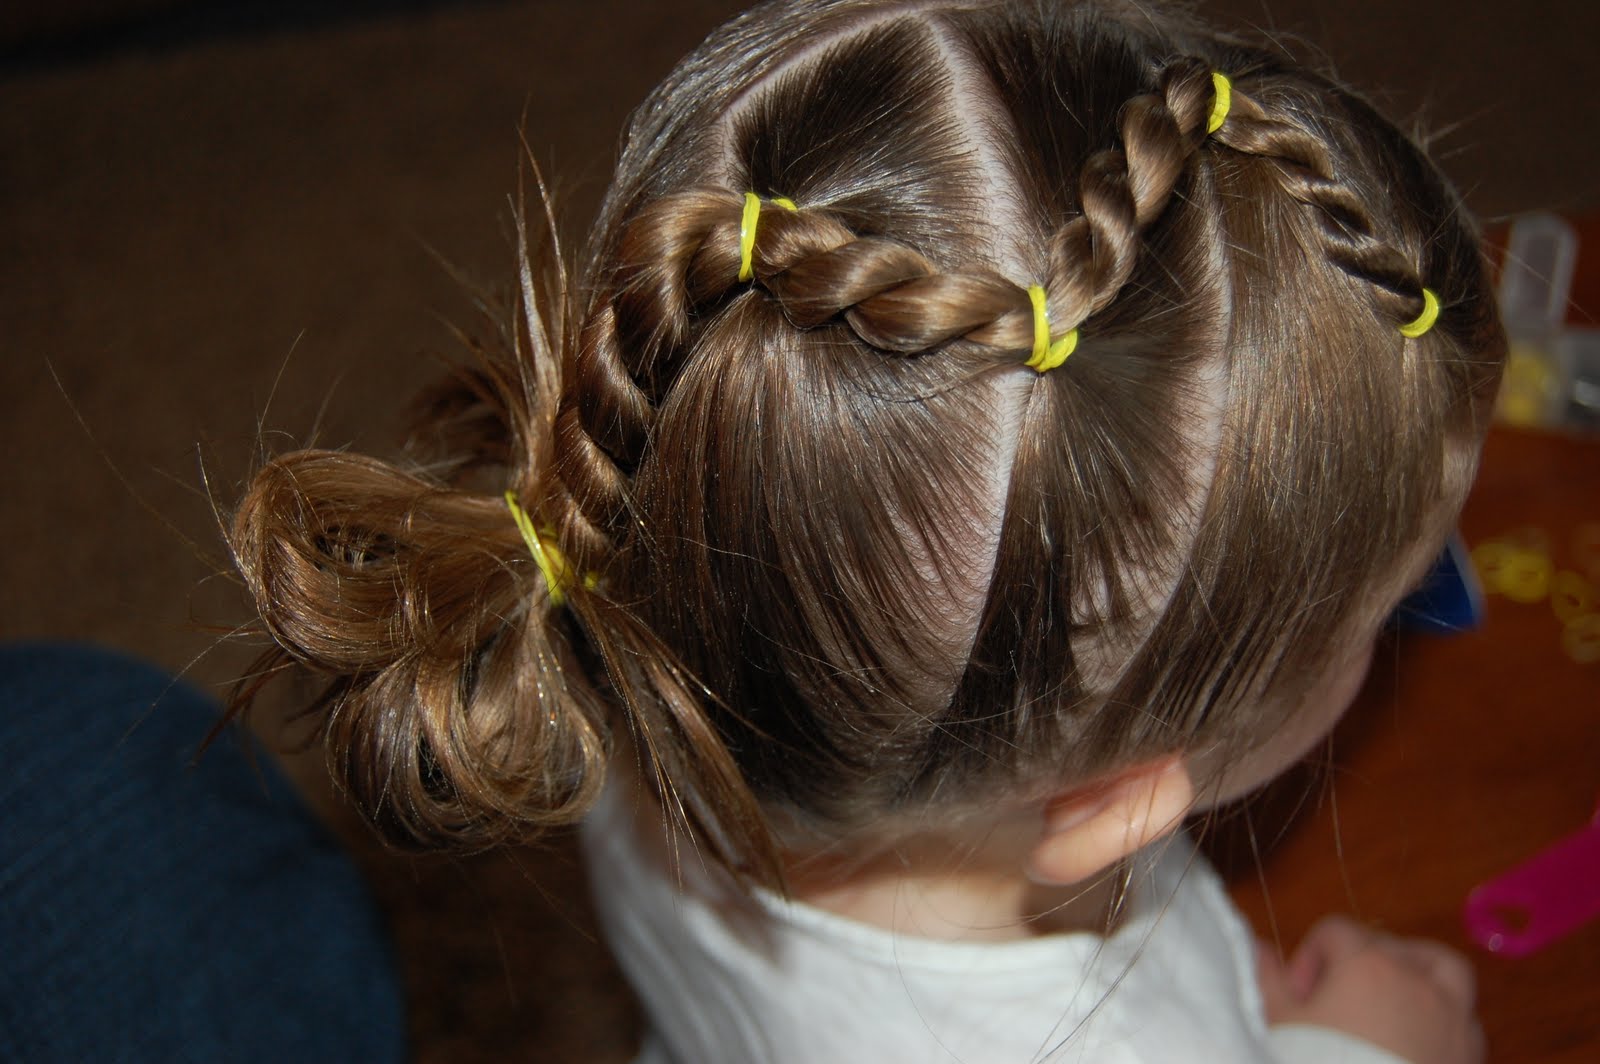
I thought this was kind of fun. For this one I started by parting her hair on the side all the way down. I then sectioned off this first ponytail starting about an inch down the part and going straight down. I put the elastic to one side. On the next ponytail I put the elastic on the other side. Then I took the hair from the first pony and made a rope and attached to the second. I continued this clear back. When I got to the crown of her hair I sort of angled the parts down towards her neck. I meant for this to be a side ponytail but it ended up pretty centered. I will have to try again. By alternating which side I put the ponytail on it created a zig zag. With the hair on the other side of the part I just combed it into the bottom ponytail. Then I made a messy bun. To top it off I added two adorable bright yellow daisies from snapbandz.com


Wednesday, April 21, 2010
6 ponies with ropes

I just have one picture of this hairdo but I thought it was too cute to not share. This is Miss Emma with my cute sis-in-law Jamie. For this I started with 6 pony tails. I always start with the front middle to make sure they are even. I used different colored elastics on this one to match her shirt. Usually before I start the ponies I make a big square on the top of her head...seperate into six squares. When the ponies are done you divide the hair from the front middle pony and make two ropes and attach to the outside ponies in the back. Make ropes with the remaining two ponies in the front and attach to the back middle pony with an elastic. To make ropes you divide the hair in half and twist the two pieces the same direction. Then you twist the two twists together the opposite direction. So if you twist the two pieces clockwise you want to twist them together counter-clockwise. I will try to take some pics of how to do this to post. I used my flat iron again on this one to add a little curl. This hair do would be way cute with any 3 of Snapbandz mini flowers.
Subscribe to:
Posts (Atom)
.jpg)
.jpg)
.jpg)