Showing posts with label braids. Show all posts

Friday, May 31, 2013

Braid on Pony Short Hairstyle

We are loving M's new short hair! There are still lots of things you can do with shorter hair. For this we started by parting the hair on the side but close to the center. We combed it to the side and parted from the crown of her head to her ear and added an elastic. We left the elastic a little loose so we could flip it under later. Next we went about an inch or so from the first part and made another. With this hair you will make a braid. It works best with damp or wet hair and I use a little hairspray as well. Comb the hair towards the ponytail and start a plain 3 strand braid. You can also do a twist. This is very similar to another hairdo we did when her hair was longer. Add the 3 strand braid to the pony with another small elastic and then flip under. You can use a "topsy tail" or something to flip it but I usually just use my pinky finger. ;) We used the straightener to curl the ends of her hair under a little. We finished off the look with a deep pink daisy from snapbandz.

Monday, October 8, 2012

Kids Costumes 2012 and some braid waves

It is, once again, my favorite time of year! I love Halloween so much and have a ton of fun coming up with fun costume ideas for my kids. My daughter had a little girl in her Kindergarten class that was a peacock and she has wanted to be one ever since. I looked up tons of pictures and thought long and hard about it, and this is what I came up with. We still need to figure out what shoes to wear and I am adding peacock feathers to her hair piece...but I think it turned out pretty fantastic. My little guy was going to be a puppy until I came across this adorable owl costume. Here are my little birdies. What do ya think?
You can't really tell, but I braided her hair along the hair line in a circle in the picture above, and this is what it looked like today after I took out the braid. I just used a little shine serum on my hands as I combed my fingers through it. LOVE it!

Wednesday, March 14, 2012

zig zag double frenchies


The zig zag part on this hairdo makes it so fun! I started out with damp hair as usual and used the back of a comb with the pointy end and "drew" a zig zag in the hair. Then I parted from the crown to each ear and added a loose elastic to one side to keep it out of the way. I also tied the hair on the bottom out of the way. On the other side I started doing an inside out french braid. If you know how to french braid it is simple to do the inside out...just add the hair "under" instead of "over." When I got to where my part was at the crown and had no more hair to add I just continued with a 3 strand braid and secured the end. I did the same with the hair on the other side of her head and used an elastic to secure the two braids together in the back. I topped it off white a small hot pink daisy on a clip from Snapbandz.com. When I use a clip this way I put one of the prongs through the elastic so it won't slip. I loved the way this one turned out!

Tuesday, November 9, 2010

Criss Cross Ropes and Braids


This one was actually prettty simple. I went back about and inch and part the hair ear to ear. I made 3 ropes and 3 braids. I just did every other one a rope or braid. To make a rope braid just part the section in half, twist both sections one way, and them twist them together the opposite way. Make sure to have the braids angle toward the opposite side of the head. I continued the part from the front all the way down making two pony tails. I added the 3 ropes/braids from the right to the left pony tail and secured them with an elastic. With the ropes/braids on the left I crossed them over and under each of the ropes/braids from the left and then secured them to the pony tail on the right. I topped it off with two small white ranunculas from snapbandz.com

Monday, October 11, 2010

5 simple braids and 2 piggies


I parted the hair on each side and back to the crown to make a traingle. I split the hair in half from side to side with another part. I added an elastic to the hair at the crown. I took the hair from the front of the traingle and made a simple 3 strand braid and connected it to the back pony. I did the same thing on each side of the first triangle braid. Then I took the hair from the middle pony and split in in half. I took half the hair from the middle braid and the hair from one pony and did a simple 3 strand braid. I did this on both sides. Then I made two low ponies with the remaining hair and and added the braids to them. I clipped in two light green daisies from Snapbandz.com

Braid Knot with 2 VERY messy buns


I took these pictures for my friend over at Sew Divine Boutique. She made this adorable outfit for Miss M! I thought it turned out so cute! Go check out this outfit and many others at www.sewdivineboutique1.etsy.com
For the hair do I made two piggie tails in the front and flipped them under. I took the hair from the piggies and braided them all the way to the end. I had my little girl hold them while I continued the part back and made two more piggies. I took the two braids and tied them in a knot then attached one to each of the second set of ponies. I made some VERY messy buns and topped it all off with two antique blue hydranges from snapbandz.com For the buns I took the hair and back combed it, wadded it up and added a few elastics to hold the shape I wanted. I know...it sounds very technical! :) We got lots of compliments this day!


Friday, October 8, 2010

Braid on top hair headband


This is so simple. It is done just like the two rope headband but I just did a single 3 strand braid instead. Part the hair on one side about an inch or two back and from ear to ear. Comb the hair smooth and spray with hairspray. Take a small section right at the part line and create a braid and lay on top of the hair. Pull both sides tight and attach together at the base of the neck with a small elastic. (Note: the small elastic also helps keep the headband in place on little girls who have trouble with that.) I added an narrow orange crochet headband with a bright pink daisy with polka dot center on this one. I love to mix and match the colors of the headbands and flowers from Snapbandz to match each outfit. I used my 3 barrel curling iron to create some waves. Pretty simple!

Thursday, September 30, 2010

3 flip under knot braid with hair headband half updo


Wow! That is a long name. I will have to work on being more creative. For this one you want to leave the hair along the hairline out about an inch back. This will be the hair headband. Go about another inch back and part the hair from ear to ear and make 3 flip under knots.

Then pull them out of the way or have your daughter hold them. Pull the remaining hair on the top half of her head back into a ponytail.

Then take the 3 pieces of hair from the flip under knots and braid them together and connect them to the pony tail. Then take a piece of hair from the pony tail and wrap around the elastic to hide it. This time I just secured it with a clear elastic and pulled the hair down a little to hide the securing elastic. To finish off part the hair you left down at the hairline and part it on the side. Wet it down and comb to each side. I used some hairspray to keep it smooth. Take the hair around to the base of the neck and secure it with a little elastic. I topped this one off with a purple anemone from snapbandz.com


Thursday, September 9, 2010

4 braids+2 braids+1 messy bun


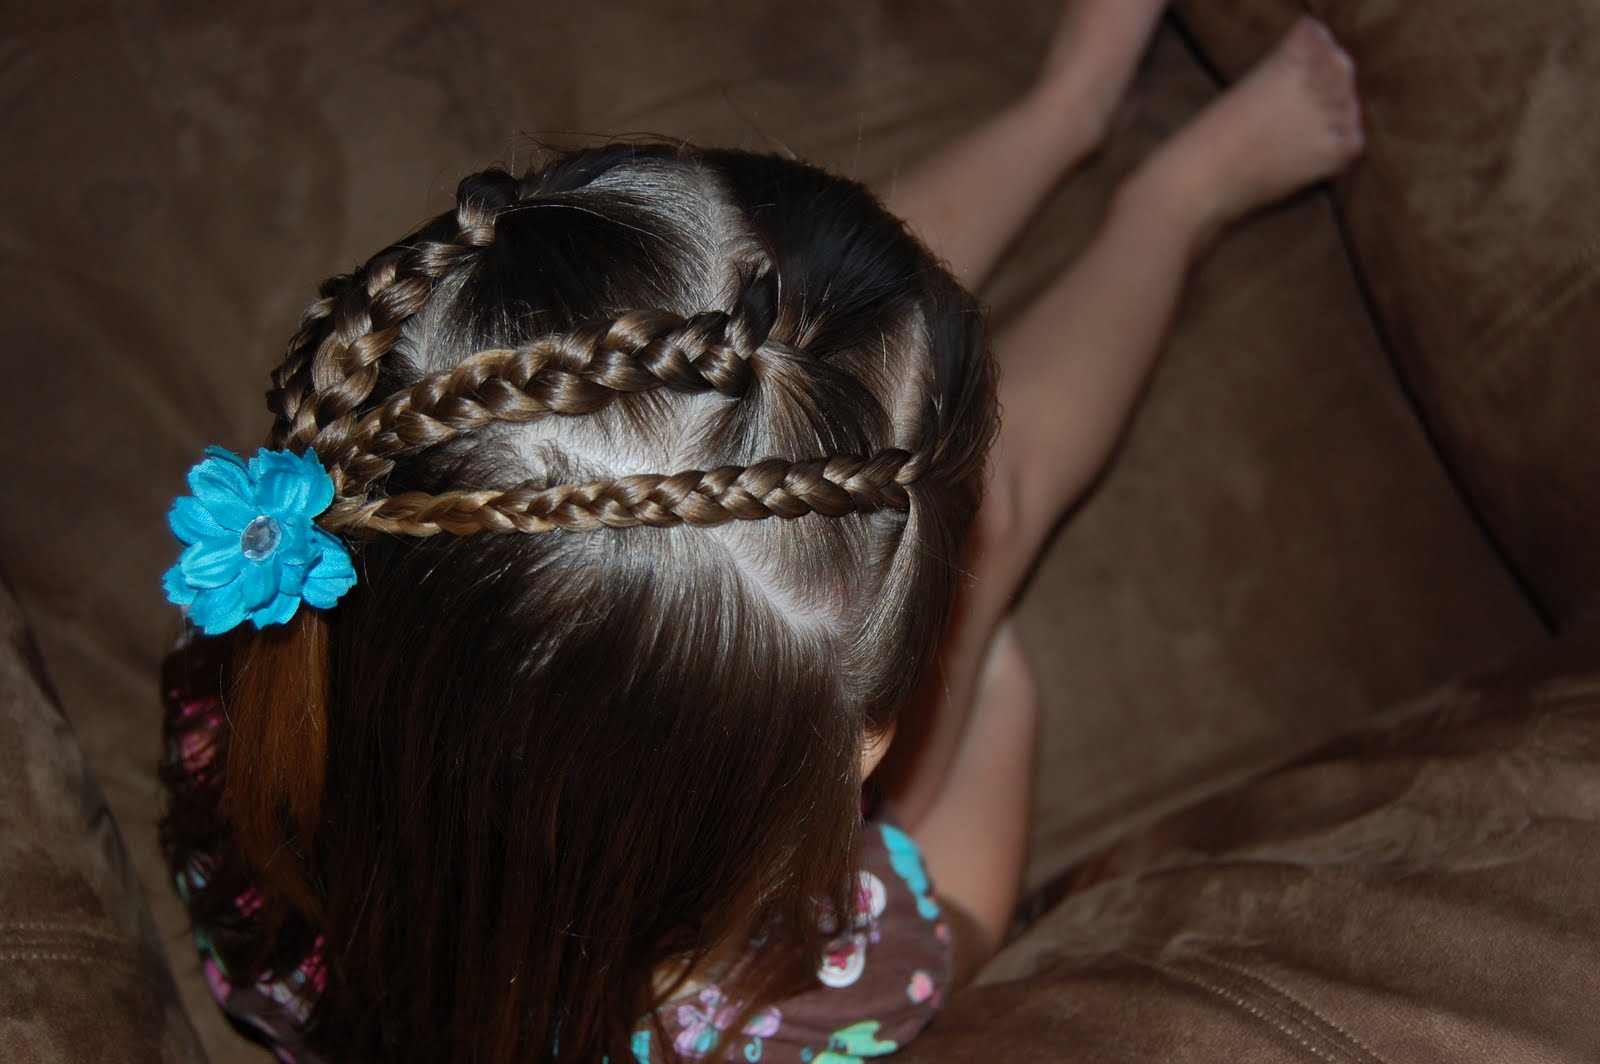
It begins like this...four braids along the front. I parted the hair from ear to ear and then down the middle. Then I split each side in half and made the braids. You want the braids and the right to angle toward the left and vice versa so they will criss cross.

I had very good intentions of getting step by step pics for this and then my camera battery decided to die. So....After I had all four braids done I continued the part down the middle of her head and made a section on each side but left hair on the bottom out. The part was from the middle to about the bottom of her ear. I made two pigtails and connected the 1st and 3rd braid to the left and the 2nd and 4th braid to the right. I wrapped hair from the pony tails around each to hide the elastics and pulled it through with my topsy tail. Next I took the hair at the base of her neck and combed it upward and added an elastic. The pony tail should be pretty close to the other two. Then I took the hair from the top two pony tails, braided them and connected them to the lower pony tail. I made a messy bun but it would look cute with the pony tail straight, curled or even braided. I topped it all off with a fuschia ruffle anemone from snapbandz.com It looked so cute that day! We went to the park after preschool and I got some pictures. She decided to be creative with her posing again...go figure. Enjoy!


Tuesday, September 7, 2010

Practice braids


I am not that great at doing french braids. I haven't had a lot of practice either. So...I decided the other day to do 3 french braids in Emma's hair to get some practice in. I love braiding all of her hair and then taking it out the next day for the wavy look. For this I just sectioned off a middle piece and pulled the two sides out of my way. I braided the middle first and then the two sides. When I got done I decided to take the three braids and braid them together at the bottom. It made one big braid. I secured the end with an elastic, curled the ends under slightly with my flat iron and added a big yellow daisy on a clip from Snapbandz. She looked so cute but I forgot to get a couple pictures with the flower in....you will just have to imagine it. Then next day I took the braids out and did a quick flip under knot in the front to keep her hair out of her face and added a flower. I also used my flat iron and curled all the straight ends under for a more finished look. So cute!
Wednesday, August 18, 2010

Four braids on a slant


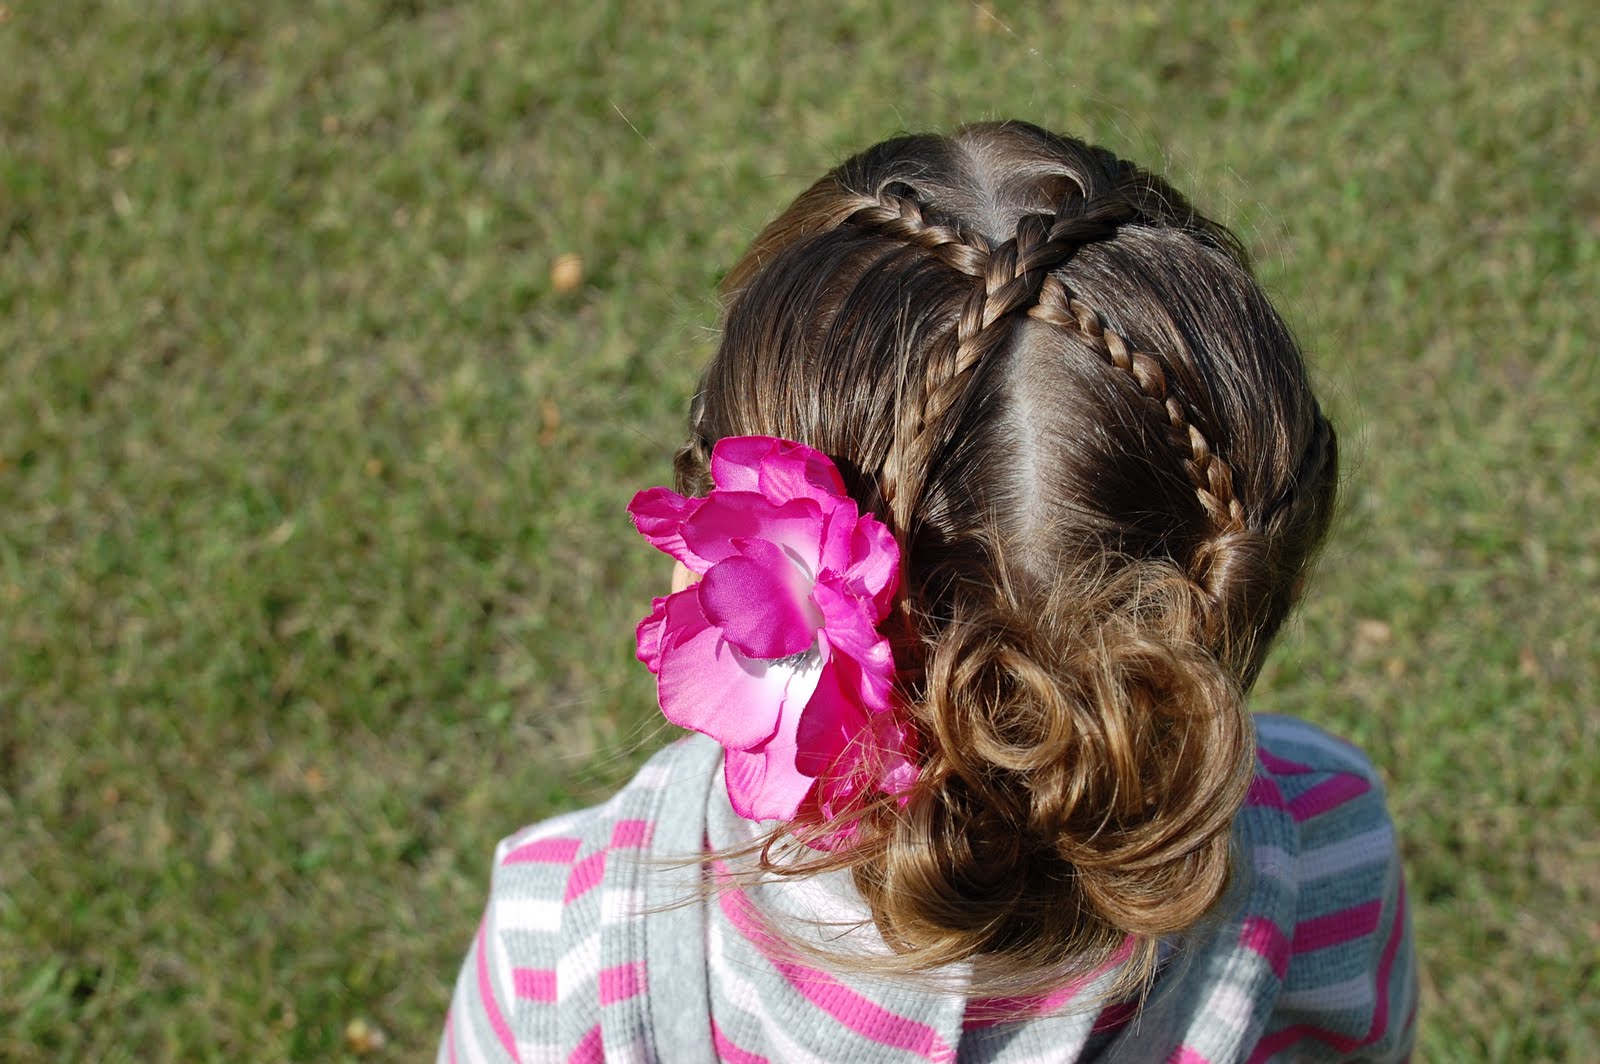
This hair do was super easy and turned out way cute. For this one you will just be working with half her hair. You can take the back and put in a pony tail out of your way if that helps. I started by combing the hair from the right toward the left of her head. I sectioned the first piece of hair at an angle towards her right ear. I just did a simple 3 strand braid but a rope braid or any other kind would work too. I secured the end with an elastic.

You want all the braids to point to the same spot where you will secure them together. I did it so they all pointed toward the back left. I continued this process until I had four braids at the front. I liked doing the parts on an angle because from the front it looks like the hair is going one way but the braids actually go the opposite.

When I had all four braids I just took them and added an elastic where they would naturally hang and removed the elastics that were holding the individual braids. I added a mini cosmo from snapbandz.com to top it off.
I thought it turned out great. Instead of using a clip or attaching the flower directly to the hair I just used an elastic. I took one tiny elastic and wrapped it around the stud snap and then snapped the flower onto it so the elastic was connected to the flower. Then I just wrapped the elastic around the other one. Voila!


Tuesday, June 29, 2010

Flip Under Knot Headband


I decided it would be fun to do a hair headband with flip under pony knots. It's the same idea as a braid headband but with flip under knots. I just parted her hair on the side and sectioned off from the part about 2 inches back and down to just behind her ear. I pulled the rest of the hair back and clipped it to keep it out of my way. Then I did about 1 inch boxes. I started at the part made one pony, flipped it under. Then I added that hair to the next box, made a pony and flpped it under. I did that all the way down. I repeated this on the opposite side. Then I made a part from the last pony on each side across the top of the head and put it in a pony tail. I took the hair from the two sides and made fishtail braids then added them to the big pony. To cover my elastic I just took a piece of hair from the bottom of the pony and wrapped it around. I used a clear elastic to secure it and pulled it tight. Then I just moved the hair a little so you can't see the elastic. This hair do would be cute just left down without the pony tail in back or you could add a real headband with it left down. You could also do lots of different kinds of braids in the back or just come the hair in with the pony tail. I added a pink hydrangea from Snapbandz and called it good. This time I left the rest of her hair straight and just flipped the ends under a little with my flat iron. Super easy and cute!