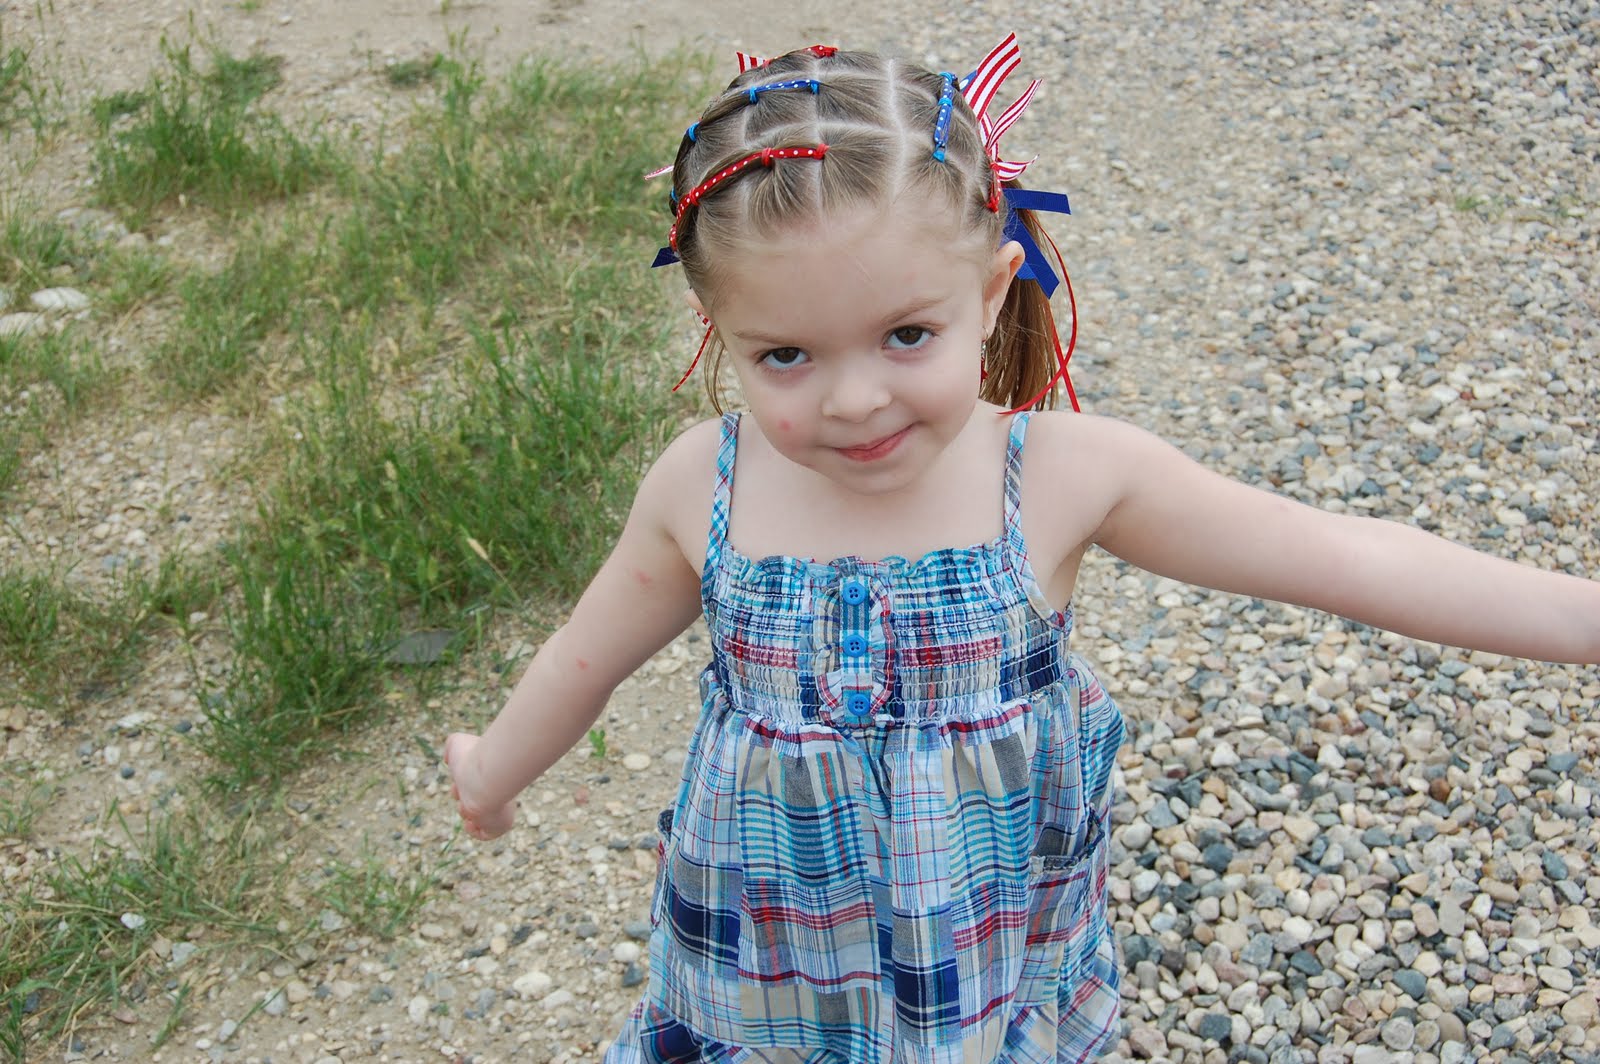
This is how I did Emma's hair for the 4th. It was way over the top and she got tonz of compliments. Maybe too many. By the end of the night she would just glare at people when they mentioned it. :) She isn't really into attention from strangers. I just did 3 rows of puffy braids on one side and two going back on the other side. I just added the ribbon to the first elastic and tied the rest of the elastics around the ribbon and hair. I trimmed the ribbons at the end so they were the same length as her hair. I pulled the back into two ponies and added a couple elastics that I tied ribbon onto. Soooo cute!
Wednesday, July 7, 2010
Over the Top
This is how I did Emma's hair for the 4th. It was way over the top and she got tonz of compliments. Maybe too many. By the end of the night she would just glare at people when they mentioned it. :) She isn't really into attention from strangers. I just did 3 rows of puffy braids on one side and two going back on the other side. I just added the ribbon to the first elastic and tied the rest of the elastics around the ribbon and hair. I trimmed the ribbons at the end so they were the same length as her hair. I pulled the back into two ponies and added a couple elastics that I tied ribbon onto. Soooo cute!
Tuesday, June 29, 2010
Flip Under Knot Headband
I decided it would be fun to do a hair headband with flip under pony knots. It's the same idea as a braid headband but with flip under knots. I just parted her hair on the side and sectioned off from the part about 2 inches back and down to just behind her ear. I pulled the rest of the hair back and clipped it to keep it out of my way. Then I did about 1 inch boxes. I started at the part made one pony, flipped it under. Then I added that hair to the next box, made a pony and flpped it under. I did that all the way down. I repeated this on the opposite side. Then I made a part from the last pony on each side across the top of the head and put it in a pony tail. I took the hair from the two sides and made fishtail braids then added them to the big pony. To cover my elastic I just took a piece of hair from the bottom of the pony and wrapped it around. I used a clear elastic to secure it and pulled it tight. Then I just moved the hair a little so you can't see the elastic. This hair do would be cute just left down without the pony tail in back or you could add a real headband with it left down. You could also do lots of different kinds of braids in the back or just come the hair in with the pony tail. I added a pink hydrangea from Snapbandz and called it good. This time I left the rest of her hair straight and just flipped the ends under a little with my flat iron. Super easy and cute!
Thursday, June 24, 2010
Triple Knot Pig Tails
I started by parting on the left side and the right all the way back to the crown so I had a big square on the top of her head. Then I parted that about an inch or so back so I had a rectangle at the front of her head. Then I parted this down the center so I had two boxes.
Then I took the two pieces of hair as if they were laces and "tied" them. You want to wrap the hair around twice so it creates a knot. Then just pull the hair tight on both sides. This works best with wet hair and I even added a little hairspray first.
I repeat this back three times. I alternated on each knot the direction I tied it. The first I did the right over left...second, left over right...and third, right over left again. When you are done you should have three knots like this.
After I did the three knots I just part the rest of the hair down the middle in the back and made two ponies that included the hair from the knots. I topped this do off with two spikey green hydranges from www.snapbandz.com Super cute!
Tuesday, June 22, 2010
Simple Part

To add variety to different hairdos all you need to do is change the way you part the hair. You can do a simple straight line, off center, zig zag, boxes, sharp angle and many others. This hair do is very simple. Half the hair pulled up into two pig tails. On this one I did a sharp angle on the part. I started the part at the far left and came back to the far right. The hair is still evenly seperated...just not down the middle. I have also done this where I brought the top two pigtails down to two more on the bottom. Just part the second half of the hair back to the left again. So cute. On this one I decided to do messy buns but it looked cute just down too. I also had a few curls with the trusty flat iron. The flowers are my new eggplant daisies on Snapbandz.com
Wednesday, June 16, 2010
Linked Updo
This one I started in the back. I did a part about an inch high from the base of her neck and straight across. Then I made two pony tails. I did this all the way up to her crown until I had six ponies. Then I took the bottom two ponies and did a link...just like tying a shoelace. This works best when the hair is wet. I even put a little hairspray on it to keep it smooth. I would have done links all the way up, but her hair is not quite long enough. So on the second row I just twisted the hair and attached it to the pony right above on both sides. On the top I did twist also and attached to the main pony that I did at the end. On the front of her hair I just sectioned 3 boxes and did flip under ponies. I pulled all the hair on top back into a pony and attached the hair from the remaining two ponies from the back. To finish it off I just did a messy bun and added a turquoise daisy with jewel from Snapbandz.com
Monday, June 14, 2010
Adorable little models...

My friend Kelly asked me to take some pics of her adorable new baby girl. I let her know that I needed a new model for Snapbandz and we had a deal. I also grabbed her other little girl and took a pic while I was there! Too cute. Some of the flowers aren't on the website yet...something to look forward to!


This is just a simple way to spice up a headband.

I started with wet hair and parted in on the side. I also parted the hair from the part down along her hair line as far back as I wanted the braid and added the rest of the hair to a pony in the back to keep it out of my way. I only did about an inch or two back so that I could add the headband when I was finished. Then I did an inside out french braid all the way down behind the ear. I did this on both sides and then connected the two pieces of hair with an elastic at the base of her neck. Then I added the headband. Super cute! This is a narrow khaki crochet headband with a brown gerb from snapbandz.com


Her hair was still wet in these pics. After it dried I used my flat iron and did a few curls and it looked adorable. The braid still looked good the next day so I untied the elastic at the base of her neck and made the braids go all the way down. Then I pulled her hair hair up in a pony tail and connected the two braids to it. I added a cute flower from Snapbandz and she was ready to go! Here's a picture from later that night.
I started with wet hair and parted in on the side. I also parted the hair from the part down along her hair line as far back as I wanted the braid and added the rest of the hair to a pony in the back to keep it out of my way. I only did about an inch or two back so that I could add the headband when I was finished. Then I did an inside out french braid all the way down behind the ear. I did this on both sides and then connected the two pieces of hair with an elastic at the base of her neck. Then I added the headband. Super cute! This is a narrow khaki crochet headband with a brown gerb from snapbandz.com
Her hair was still wet in these pics. After it dried I used my flat iron and did a few curls and it looked adorable. The braid still looked good the next day so I untied the elastic at the base of her neck and made the braids go all the way down. Then I pulled her hair hair up in a pony tail and connected the two braids to it. I added a cute flower from Snapbandz and she was ready to go! Here's a picture from later that night.
Subscribe to:
Posts (Atom)